

Never fail your pot rice again.
Everything I learned about cooking rice

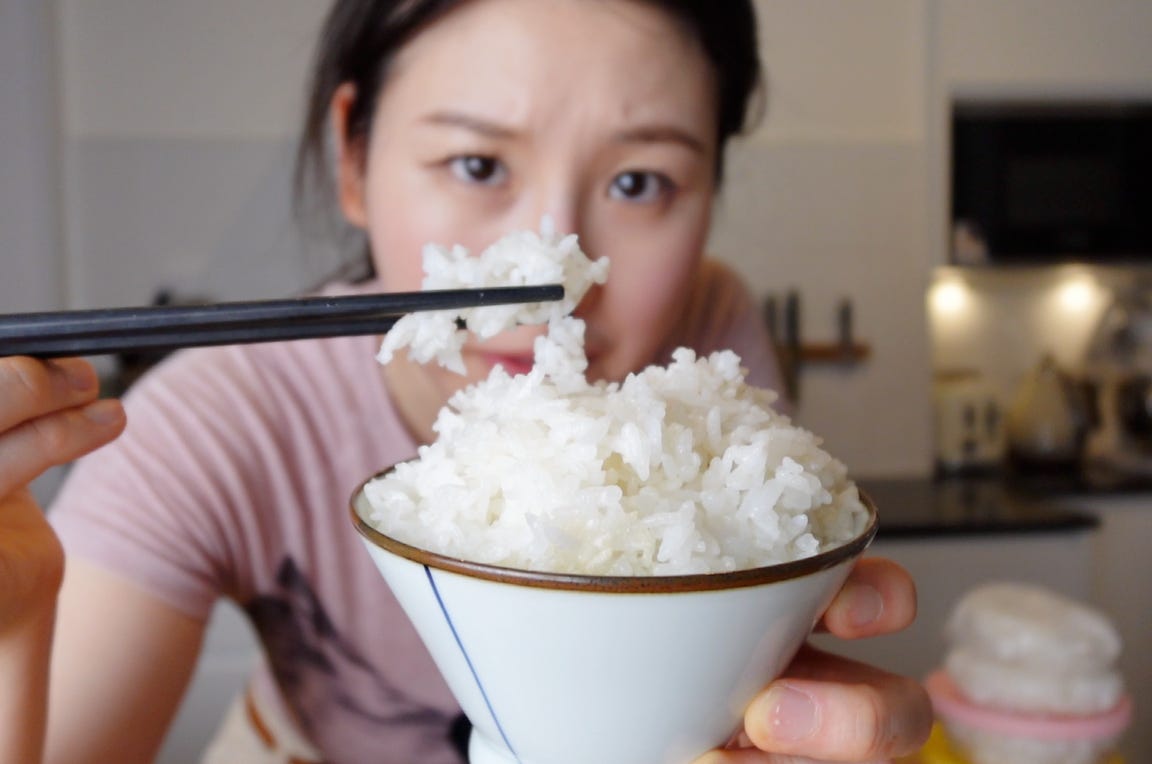
Chances are, we all cooked up some shi* rice for dinner at some point in our lives.
If you’ve ever created what we call in Korea the 3-tier rice: the burnt bottom, the soggy middle, and the raw top layer…
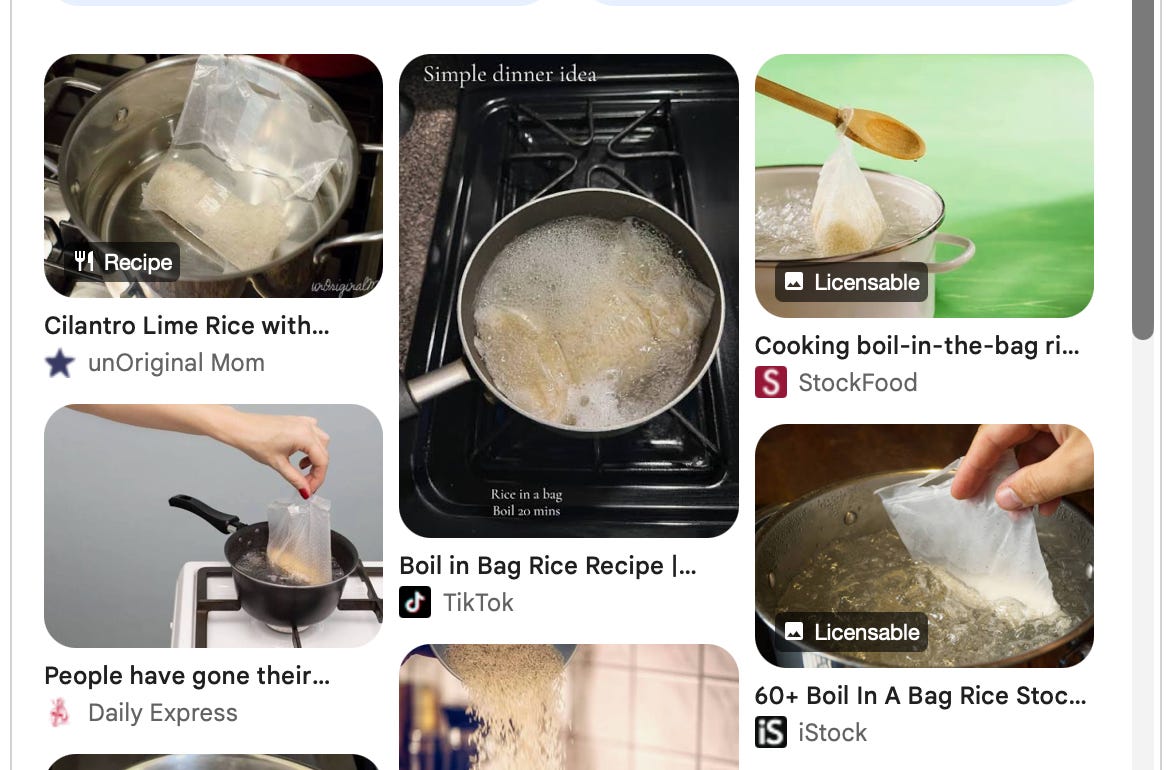
or you cook rice in a plastic package (deep sigh)
Welcome - You’re in just the right place.
When I first had to cook rice without a rice cooker in London, I found a porridge in my pot.
That’s how I started my research about making rice and found a ton of misinformation, both on the Korean AND western side of the internet.
Why, are there so. many. recipes. with messed up rice to water ratios?
So here I am, to provide you the gist of the knowledge and tips I gathered from the food scientists, rice researchers, YouTube videos, the Asian community and my Korean mom, so you won’t ever need any other guide or rice recipe again.
No more soggy, raw, or unevenly cooked rice for you.
Only the best of the best.
I promise!
…so what makes cooked rice, ‘the best’?
Before answering this question, we need to understand that the “best rice” might look different for different types of rice.
Remember the poor Masterchef girl who got slammed for using paella rice to make risotto? Lots of short grain rice look, but they have completely different starch structures.
Can you guess which grain below is for risotto and which one is for sushi?
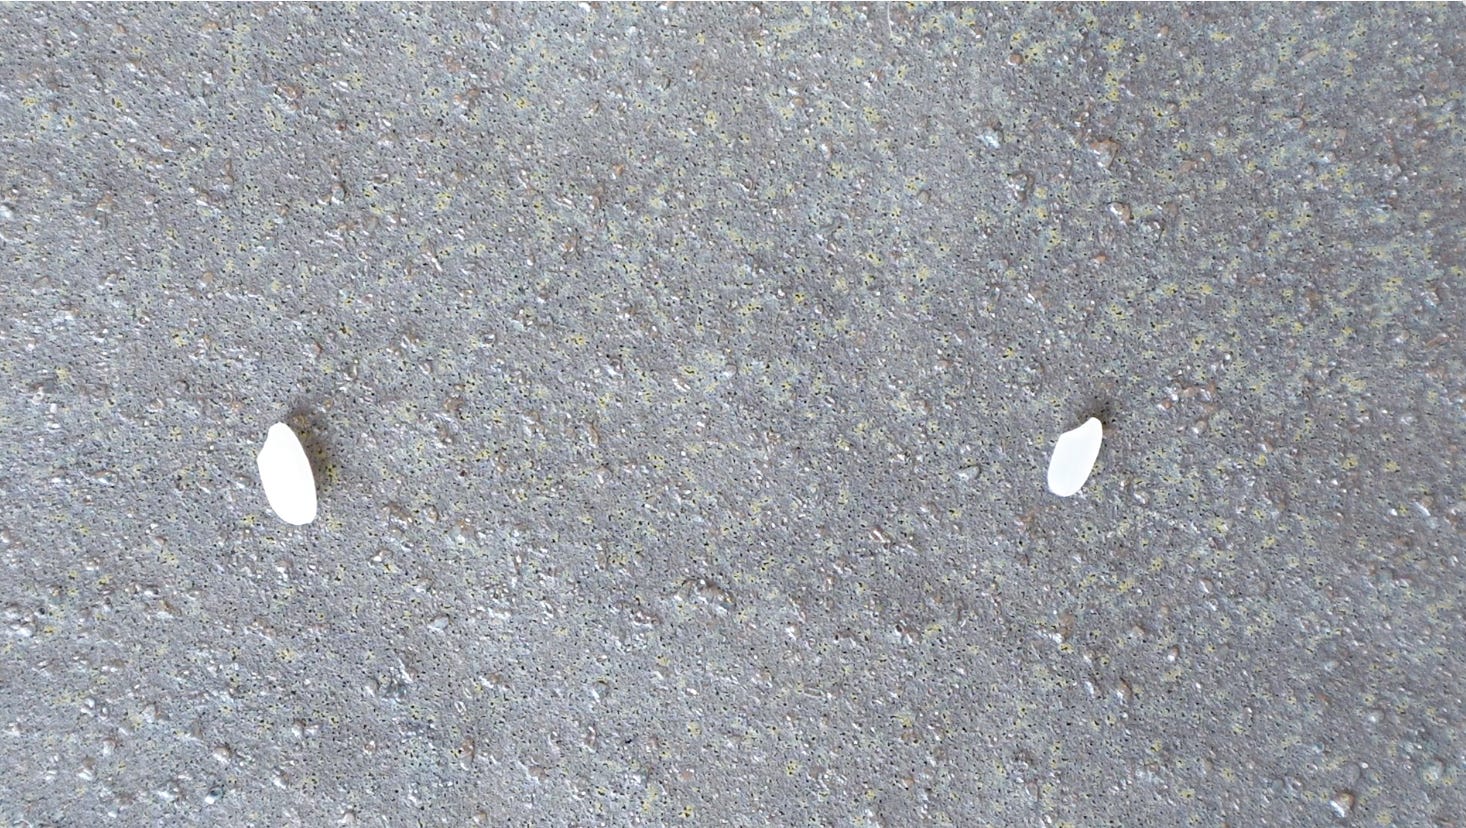
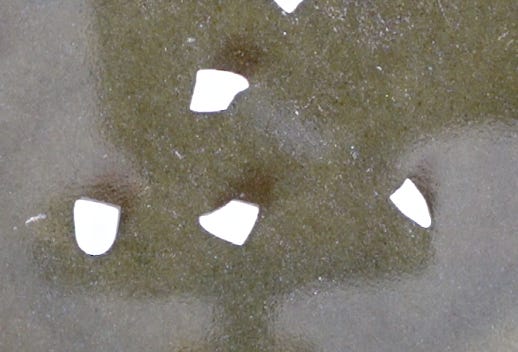
For those who guessed it wrong…
I’ll do a super quick run down of the white rice you’ll commonly find in a western supermarket. It will be useful, but you can skip this part if you just want to get to the cooking.
The SHORT ONES
Glutinous rice (Sticky Rice) Did you know that they actually don’t have gluten? Their stickiness comes from a lack of protein that keeps grains separate. Steam and pound this one for mochi and Korean rice cakes.
Short grain Japanese / Korean rice (TODAY’S HERO!) Slightly more translucent than risotto or paella rice. We want tender, distinct and shiny grains that are slightly sticky, never mushy.
This is the rice that Korea and Japan have taken to a level of obsession.
Fun fact: In a traditional Japanese sushi training, sushi chefs train to put exactly 280 grains per a piece of sushi, for dinnertime.
My fav brands: Koshi-hikari from Japan or Chucheong or Sindongjin rice from Korea, bag ’em when you see them.
Arborio / Carnaroli (Risotto rice) They release a lot of starch when you stir = creamy risotto sauce. The goal is al dente, NOT fluffy! (You’ll not end up well arguing with Italians about their rice…)
Bomba / Calasparra (Paella rice) A beast that absorbs ~3x its volume of stock! Built for socarrat, the crispy bottom of paella (that would exile a sushi chef)
The LONG ONES
Basmati The one in biryanis, curries, pilafs across India and Pakistan. Individual grains ‘fly around’ on their own, and taste airy and fluffy.
Jasmine Basmati’s softer, slightly stickier southeast Asian cousin - think Thailand, Vietnam, Cambodia.
Today, I’m focusing on my favourite type of rice: short grain, the kind everyone knows as sushi rice.
…Okay, okay, enough rice taxonomy. Just tell me how to cook the best short grain rice?
I’ll go through the journey, step by step: buying, washing, cooking, eating & storing.
1. You need to buy quality rice (duh).
What to look for:
Whole, unbroken grains: Peek through the bag and see how they’ve been treated! Broken grains will cook faster and turn mushy.
Recent date of production
Buy from an Asian grocery store if you can. My honest ranking from trying different brands in Europe:
Korean or Japanese imported > local brands (sorry, Europe) > supermarket-owned brand. The difference is real.
2. Wash the rice “the correct way”
There’s a lot of drama about the ‘correct way’ to wash rice. Sieve? No sieve?
Well… the tool and timing is not the problem.
The reason you wash rice is to remove the starch on the surface. Because, if you cook unwashed rice, this starch will gelatinise and get gummy and gluey before the rice is cooked.
So sieves are not guilty… but running tap water is. Not much starch will get washed off.
To get rid of it, we must fully submerge the rice in water and shake it off.
That means:
1) stir the rice in water with your hand in a bowl
2) drain (use a sieve)
3) repeat until the water runs clear (~3 times. I know, it’s annoying, I usually stop at 3x)
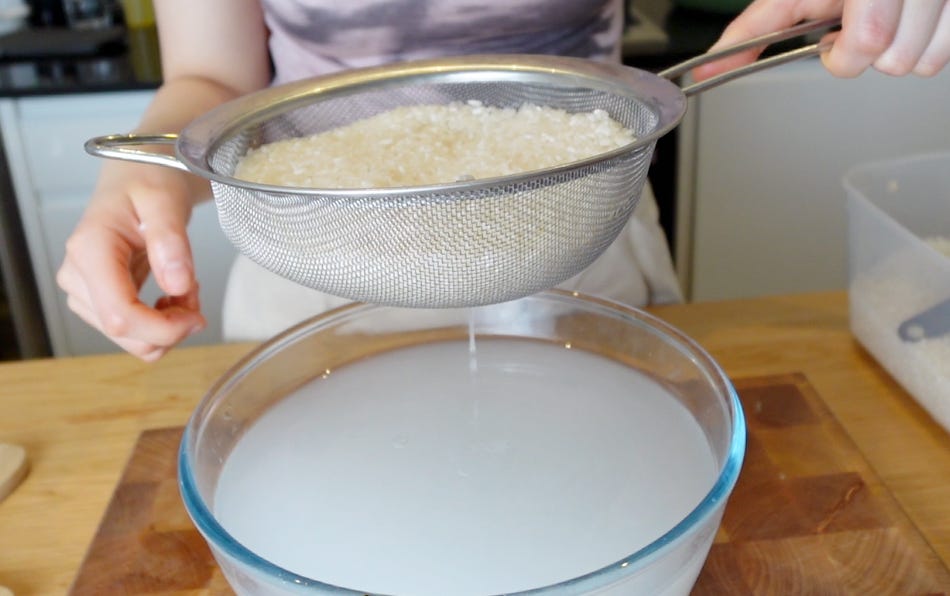
By the way, use clean water for the first rinse, because dry rice is pretty thirsty.
3. Soak (..but you can skip if you’re hangry)
This is an underrated tip, but 30 minutes of soaking in water can improve your rice.
During soaking, the grains absorb water evenly throughout, and they will cook more uniformly.
If you soak, you’ll need to slightly reduce (~10%) the water you add (more on this next).
4. Choose your pot. A heavy one, preferably.
You can cook really good rice in almost any pot with a lid.
BUT there is a scientific ranking from rice researchers (did I mention the rice obsession in Korea?):
Cast iron > stone pot > pressure cooker > electric cooker > saucepan
This is from a Korean national research centre, who literally hired 400 rice gurus to rank rice cooked in different ways!
The heavy bottom and a heavy lid is the secret, because it traps steam better and distributes heat more evenly.
5. ★★★Put the right amount of water in the pot ★★★
This is the single most important thing to nail (I mean, look at the stars I put)
There are 3 truths about rice and water, and knowing these, you’ll never need any recipe again.
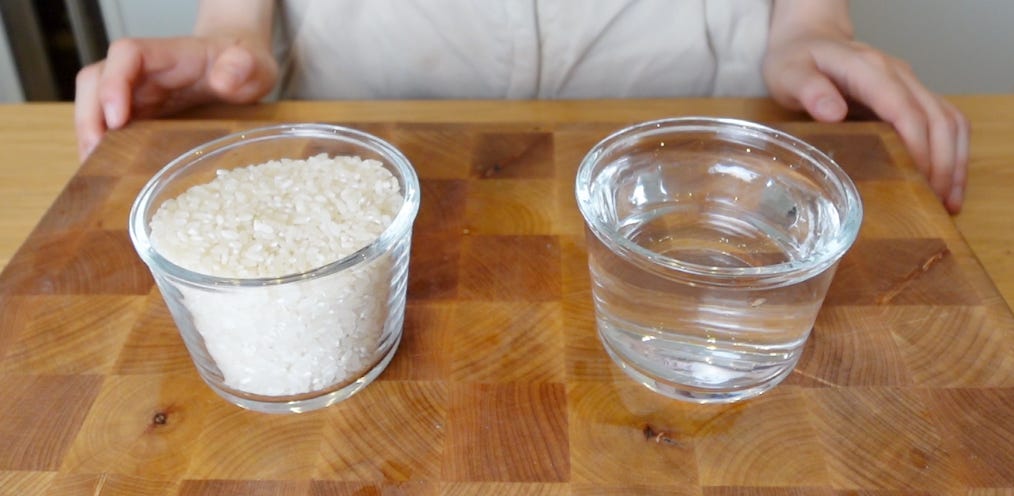
Rice absorbs water in a 1:1 ratio.
You need add some “extra” water on top of that, to prepare for evaporation.
The amount of evaporation is similar even if you cook more rice in the pot.
So, your goal is to find and note how much water evaporates when you cook with your favourite pot.
My advice: Start with 1/3 cup evaporation water, and see if you like the rice you cooked.
If the rice is too soft for your liking, reduce 1 or 2 spoons from that next time. If it’s too stiff, increase a bit, up to 1/2 cup!
And keep that GOLDEN FORMULA handy!
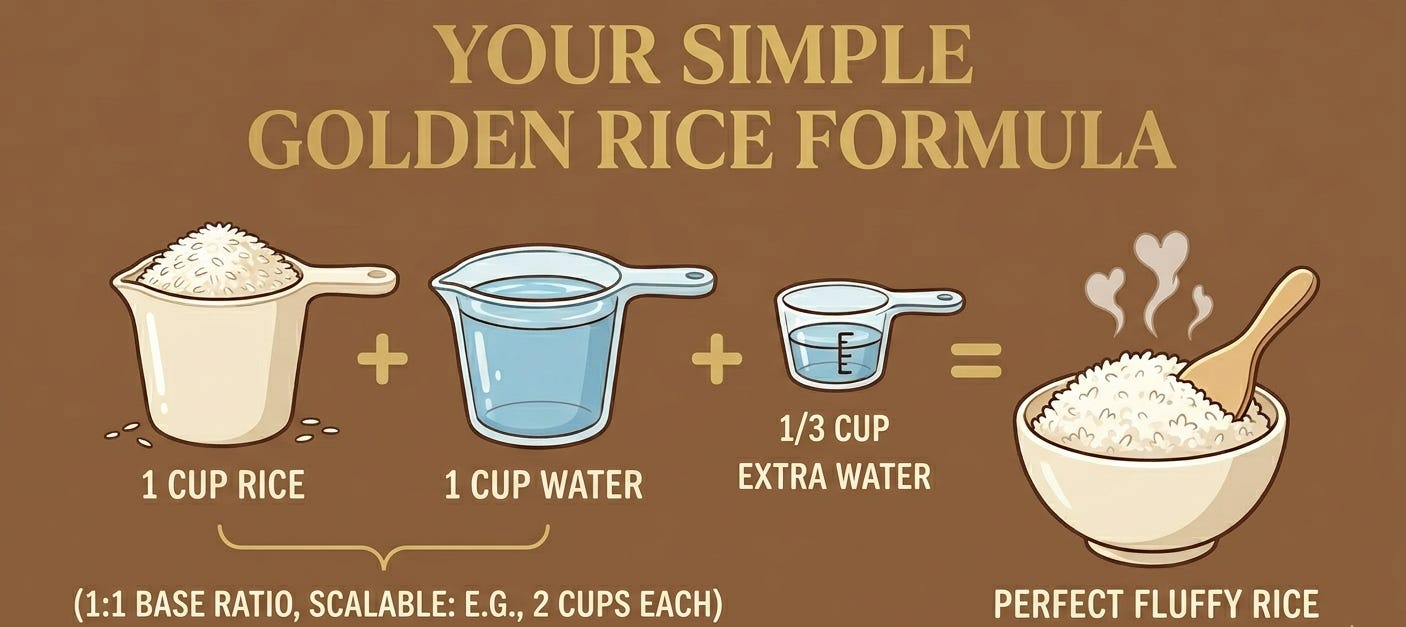
If you use a smaller pot or a weaker heat source, reduce 1-2T of extra water - you get the idea!
Congratulations. Now you never need to rely on a random rice recipe ever again.
What about the ‘first knuckle trick’ in Asia?
This is a shortcut that’s been gatekept in Asian kitchens. For those who don’t know, how you do it is:
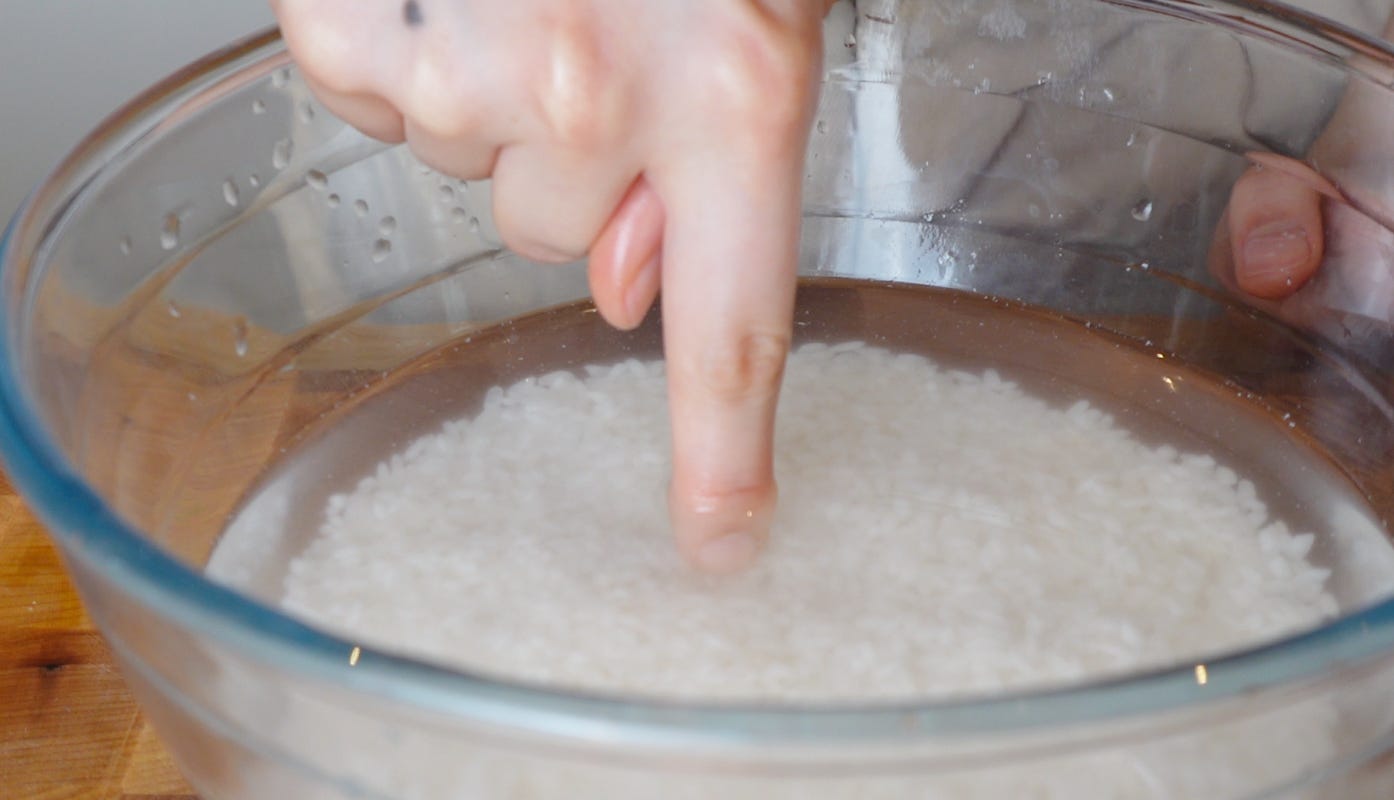
You put rinsed, drained rice into your pot.
Place the tip of your index finger on the surface of the rice and add water until it reaches your first knuckle joint.
This works because the added water is usually 1/3 to 1/2cup of water in a medium sized pot. Obviously if you use a HUGE pot, it will be a lot more water (= you get a porridge)
The smart approach is to find where in your finger the right amount of water comes up to, when you use your favourite pot!
*Note: For pre-soaked rice: reduce your water slightly, about 10% less, since the rice already absorbed some water.
6. Heat the rice. Resist the urge to open the lid for 25 minutes.
The recipe is:
Boil: Bring rice and water to an aggressive boil over medium-high heat, uncovered.
Lid on: Reduce to lowest heat and put the lid on.
Cook: Wait for ~15 minutes, DO NOT lift the lid at any point.
Rest: Turn the heat off and wait for 10 minutes. Still DO NOT lift the lid to check the rice.
That final 10 min REST is NOT optional.

Here's why, for the rebellious and impatient (=me):
When you turn off the heat, the bottom of the pot is wetter and hotter than the top. Resting lets the moisture move upward to the drier top, while the starch finishes gelatinising from the residual heat. Lift the lid too early, and you lose the steam doing that work.
7. Mix the rice
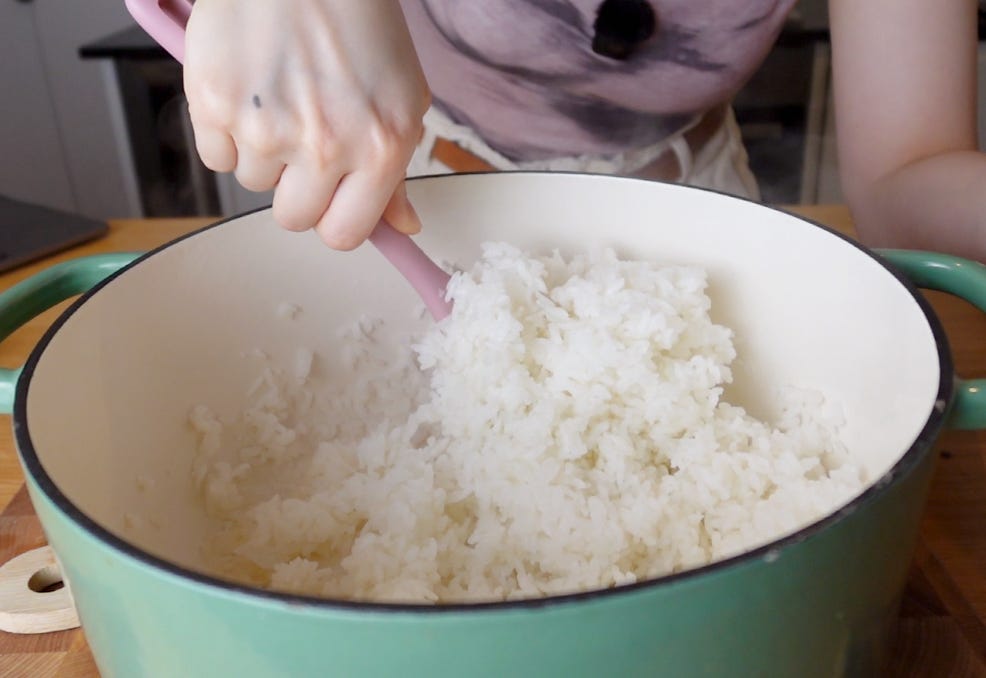
When you finish cooking, fold the rice gently in the pot two or three times, and let the steam out for a minute.
This is because excess steam would otherwise condense and drip back down, making the top layer soggy and cake-y.
Now you have the PERFECT rice, ready to be devoured with your favourite Korean banchan!
8. In the unlikely event that you have leftovers
Option 1. Refrigerate: You can keep rice 3-5 days safely in an airtight container. Let it cool before refrigerating.
Option 2. Freeze (My preferred method): This stays perfect for officially 2 months (tbh, more). Keep 1x portion in ziplock bags, plastic wraps, ice cube trays… I freeze mine in a glass container with a silicone lid with a small steam vent!

FYI, freezing also reduces starch and prevents blood sugar spike.
7. Reheating frozen rice
Microwave it.
BUT make sure it’s a covered container with a steam vent,
OR in open bowl, with a small ice cube in it, which creates just enough steam to make it fluffy again.
The summary, for the ones who just want the answers on a single page.
Print it, screenshot it, share it.
[Ratio - Start with this, and adjust for your own pot]
[Method]
Submerge rice in cold water, shake with your hand, drain. Repeat 3x until the water runs clear.
Optional: Cover washed rice with cold water and soak for 30m. Drain completely.
Add rice to pot. Add 1 cup water per 1 cup of rice, plus 1/3 to 1/2 cup flat for evaporation. (Or use your established knuckle level.) If rice was pre-soaked, reduce water by 10%.
Heat up pot in medium-high heat, uncovered.
When it reaches a roaring boil, turn to the lowest heat. Put the lid on.
Cook 15 minutes. Do not lift the lid.
Turn heat off completely. Still do not lift the lid. Leave for 10 minutes.
Remove lid. Fold rice from the bottom up 2-3 times. Let it breathe for 1-2 minutes.
Serve. (Try not to eat the entire pot)
Leftovers: cool, store airtight in the fridge (3-5 days) or freezer (2 months). Reheat with a splash of water covered, or with an ice cube on top if open.
Before you go, please, tell me you’ve retired rice recipes, 3-tier rice or instant rice bags. I need to know this helped.
If it did, subscribe. There’s more coming!